Viewing job plans
Sections
The puppet job
plan command allows you to preview a plan for a Puppet job without actually enforcing any change. Use this
command to ensure your job runs as expected.
You can preview plans for three types of targets, but these targets cannot be combined:
-
View a plan to enforce change on a list of nodes or a single node
-
View a plan to enforce change based on a PQL nodes query
-
View a plan to enforce change on an application or an application instance in an environment
Results from the job plan command
The puppet
job plan command returns the following about a job:
- The environment the job runs in.
- The target for the job.
- The maximum concurrency setting for the job.
- The total number of nodes in the job run.
- A list of application instances included in the job, if applicable.
- A list of nodes sorted topographically, with components and application instances listed below each node. The node list is organized in levels by dependencies. Nodes shown at the top, level 0, have no dependencies. Nodes in level 1 have dependencies in level 0. A node can run after Puppet has finished running on all its dependencies.
puppet job
         plan
does not generate a job ID. A job ID is created, and
shown in the job plan, only when you use puppet
job run. Use the job ID to view jobs with the puppet job show command.After you view the plan:
- Use puppet job run <SAME TARGET AND OPTIONS> to create and run a job like this.
-
Remember that node catalogs might have changed after this plan was generated.
-
Review and address any errors that the service reports. For example, it detects any dependency cycles or components that not properly mapped to nodes.
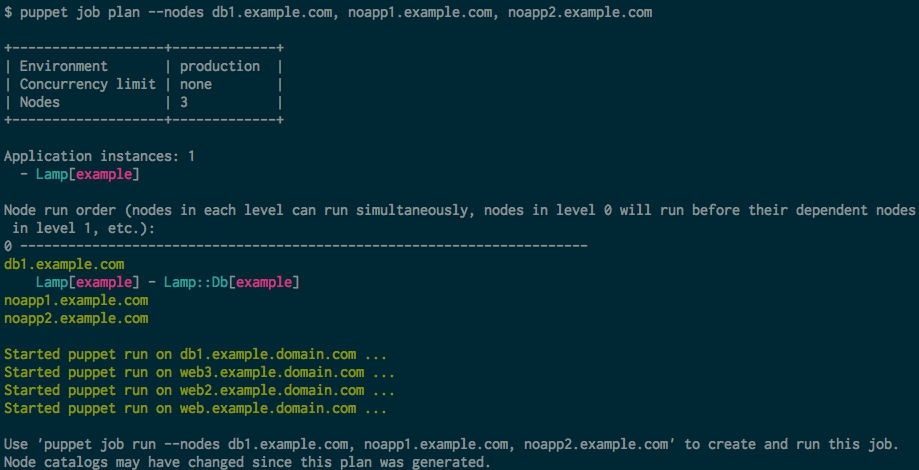
Example job plan
The following is an example plan summary for a job that runs on a list of nodes that contain a partial application instance.

View a job plan for a list of nodes or a single node
You can view a plan for enforcing change on a single node or a comma-separated list of nodes.
If you're running this command
from a managed or non-managed Windows workstation, you
must specify the full path to the command. For example, c:\Program Files\Puppet Labs\Client\bin\puppet-task run.
Install the tasks you want to use.
Make sure you have permission to run the tasks on all nodes.
Make sure you have permission to run the tasks.
Make sure you have access to the nodes you want to target.
Make sure you have permissions to run tasks and PQL queries.
Make sure you have permissions to run jobs and PQL queries.
- To view a plan for a single node:
puppet job plan --nodes <NODE NAME> <OPTIONS> - To view a plan for a list of nodes, use a comma-separated list of node names.
 puppet job plan --nodes <NODE NAME>,
                     <NODE NAME>, <NODE NAME>, <NODE NAME> <OPTIONS>
-n in place of --nodes.View a job plan for a PQL nodes query
Use a PQL nodes query as a job target. In this case, the orchestrator presents a plan for a job that could run on a list of nodes returned from a PQL nodes query.
View a job plan for applications or application instances
You can view a plan for enforcing change on all instances of an application or for a specific instance of an application.
- To view a job plan for all instances of an application:
puppet job plan --application <APPLICATION> <OPTIONS> - To view a job plan for an application instance in an
environment:
 puppet job plan --application
       <APPLICATION INSTANCE> <OPTIONS>
-a in place of
--application.Puppet job plan command options
The following table shows common options for the puppet job plan command. For a complete list of
options, run puppet job --help.
| Option | Value | Description |
|---|---|---|
--environment, -e
|
Environment name | Overrides the environment specified in the
orchestrator configuration file. The orchestrator uses this option to:
|
--concurrency
|
Integer | Limits how many nodes can run concurrently. Default is unlimited. You can tune concurrent compile requests in the console. |